How to brighten dark photo/video areas without losing highlights
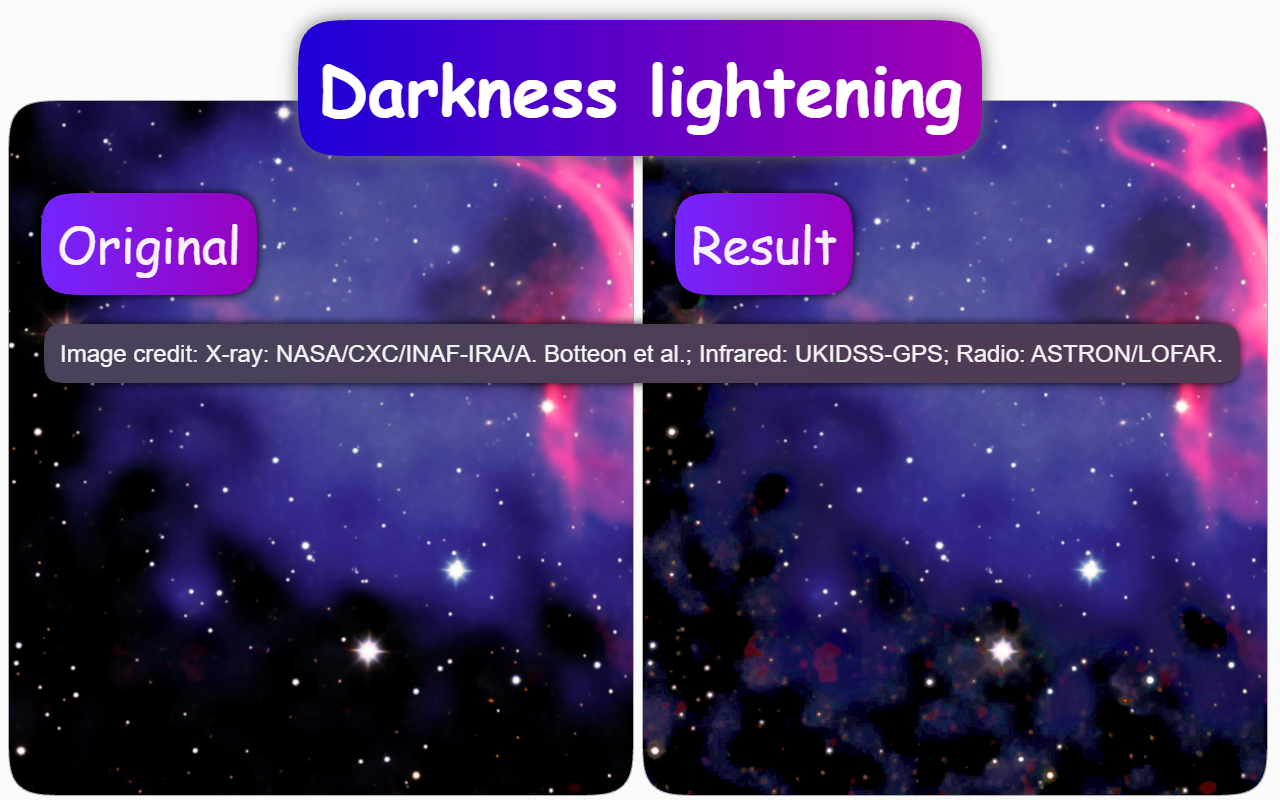
Short answer
Choose the preset “☕ Coffee-colored darkness” for the “Dynamic darkness lightening” effect in the Page context extension.
What can you gain by brightening the dark parts of an image or video?
1. For real-world reasons
- See texture in dark areas, hair, and clothing.
Clothing and hair in real life usually do not look like a single uniform blob. By brightening them, you can often see how the hair is styled and how the clothing fits. - See dark details on a monitor while the room light is on.
Room light falls on the screen, and this determines the minimum brightness the screen needs in order for us to see it. - See faint background galaxies, density boundaries in space images, and “filaments and threads” of gas.
In a space image, for example, shadow brightening can reveal the density boundaries of gas clouds and structures that are hidden in the original.
2. For reasons related to the authors’ intent
- See things that were useless at the time of shooting but important when viewed from another era.
When you watch archival footage, you probably do not fully immerse yourself in it because the surroundings that were natural for that time are hidden in darkness. For you, the valuable thing is the real artifacts of that era, which were often unimportant when the footage was shot. They can be made visible by brightening the image. - See movie sets.
Light reflected from walls usually provides enough illumination for objects near light sources even in shadow, but the authors force us to accept the fact that if they have rough set artifacts in frame, light specifically does not fall on them. - See the silhouette of a car.
Dark tires and the shadow under cars can blend into an indistinguishable blob until you increase the brightness of the dark part. - Correct nonexistent lighting physics created by the authors through contrast tweaking.
Viewers are supposed to pretend that a light bulb blinded them so much that they cannot see something 2 meters away from it. In the real world, this kind of blinding happens with very bright light sources, and if you are not looking at the source, the problem is easily solved. Films are often shot in the real world, so by brightening the dark parts you can often recover residual information from the shadows. - Restore the real eye color of people after contrast distortion.
The authors may change contrast based on skin tone while distorting the biological properties of the eye. By selectively increasing brightness, you can bring the eye color closer to reality. - Learn plot details.
You are shown a movie and cannot tell what happened because of the shadow. Then a blogger analyzes the video and shows how they understood the plot by examining the dark details.
How dark areas are usually corrected
- Increase gamma (the exponent).
- Increase brightness (the amplitude).
- Change contrast (adjust around gray).
What problems do conventional approaches to correcting dark areas have?
- Both gamma and amplitude affect the entire image, both the bright and dark parts, although only the dark areas need correction.
- Amplitude is poorly suited to video; it can push some information beyond the display range. In other words, by increasing brightness you will erase the bright part of the information (highlight clipping / blown-out whites).
- They do not adapt to each frame depending on brightness. That is, a bright image will become brighter, although it may not need to be touched at all.
- By adding brightness and changing contrast, you can make dark objects lighter, but completely black areas will become light, and you will lose contrast in the dark areas.
Solution via the Page context extension
You can use the Dynamic darkness lightening effect from the Page context extension. The algorithm does not simply increase brightness beyond the display range; it boosts dark parts more strongly than bright parts and completely stops brightness boosting at a selected level. Many bright images remain untouched at all. It keeps completely black objects black. There is a separate option for settings based on the local contrast level, as well as an option to ignore hue preservation, which can sometimes reveal even more information in noisy dark objects.
Maximum gain (dB)
The maximum brightness gain in decibels. Different images have noise at their own brightness level, so the algorithm lets you set the gain level above which brightness should not be increased, keeping completely black objects black and noise unnoticeable.
Maximum injection level
This is the per-channel brightness level of the original image. The part of the image with higher brightness will not be changed and will remain original.
Injection weights exponent
This is the exponent for the power function of the weights. The weights are needed for smooth blending of the modified part of the image with the original. The weight is maximum at zero brightness and minimum in the bright part at the maximum injection level.
Monochrome strength
Helps add more information from the dark parts if you are willing to sacrifice hue preservation.
It should be decreased when you understand that the dark part contains a lot of noise. A lower value lets each color channel use its own scaling, which may produce a less noisy result.
Contrast adaptivity
If you sharply boost dark objects while ignoring bright objects nearby, the information about the contrast between them is weakened; it looks as if these objects have almost the same brightness without a transition. Contrast adaptivity sets the influence of the brightness of nearby objects so that you can see a smoother brightness transition.
This adaptivity to neighboring areas leads to dark halos around bright objects. To change the halos, there are halo suppression settings.
The function can be used for different purposes:
- As decoration with halos. Halos can be more natural for an image than sharp jumps in brightness gain that hide brightness transition boundaries; here you can find a compromise. For example, in space images, halos can be natural because bright gas has smooth shapes.
- As a way to get more information where the contrast is too low.
Base size
Sets the radius of influence of the effect overall. At a value of 0, information about neighboring pixels is not used, and there will be no halo artifact.
Scale X
Sets the ratio of the horizontal part to the vertical part. This is useful when the image shape is far from square.
Halo suppression strength
Sets the sensitivity of the halo suppression algorithm. The halo suppression algorithm responds smoothly to the relative difference in brightness before and after the algorithm that creates the halos. The larger the value, the smaller the relative brightness deviation needed to completely remove the halos, that is, the weaker the influence of neighboring areas on the result. At a value of 0, there is no halo suppression.
Halo suppression exponent
The exponent in the power function of the weights. The larger the value, the stronger the halo suppression. The weights are used when blending the halo suppression component and the component with halos. The exponent is applied to the weight of the component with halos.
Limitations of the method and nuances
- Boosting shadows makes video compression artifacts more visible. Low-bitrate video often does not contain much information in the shadows; brightness boosting reveals coarse transitions between brightness levels.
- By exposing intentionally hidden artifacts, you may reduce the aesthetic value of the image.
- The larger the contrast adaptivity zone size, the more expensive the calculations, and the more noticeable the halos. Therefore, increase this size only if you see an improvement, not on the principle that the more expensive the calculations, the better.